This tutorial explains in short how to set-up a typical environment to develop Java EE 6 based applications. There is no prerequesite to this tutorial other then a working Windows XP client with sufficient CPU power and memory. During the tutorial we will need to install the following components:
- Java 6 JDK Update 26
- Eclipse IDE for Java EE Developers 3.6.2 (Helios)
- Maven 3.0.3
- Glassfish 3.1
I suggest that you create a folder where you drop all the stuff we need to set-up the environment. My Folder is C:\jee6. I will call that <dev_home> when I refer to it.
Note: In one of my recent posts I explained how to set-up a Spring environment. This process is very simmilar, therefore I will only explain deviations in this Java EE set-up.
In this tutorial we will create a little demo project. The sample application uses JSF 2.0, CDI 1.0, EJB 3.1 and JPA 2.0 (persistence unit included). The demo can be used to start development of your own enterprise project.
Installing Java 6 JDK
See this blog post.
Installing Eclipse IDE for Java EE Developers
Creating the Eclipse Projects using Maven 3
mvn archetype:generate -DarchetypeGroupId=org.jboss.weld.archetypes -DarchetypeArtifactId=weld-jsf-jee -DarchetypeVersion=1.0.0-BETA1 -DgroupId=com.mycompany.jeeapp -DartifactId=jee-app-weld -Dversion=1.0-SNAPSHOT -DinteractiveMode=false
Note: I have also marked the differences in my Spring post to make it obvious where the Spring specifics are during Maven set-up and project creation.
Note: At the time this blog post was created the weld-jsf-jee archetype was in beta state. You may use the 1.0 version when it is available. See here to find out if there is a newer version of this archetype.
Installing Glassfish 3.1
In a Java EE project you need a Java EE server. At the time this post was created Glassfish 3.1 was the only server available that provided the full Java EE 6 stack. Therefore I opt to use Glassfish. To Intall Glassfish to your local machine do the following:
Download Glassfish 3.1
- Go to Glassfish Download page.
- Select Download GlassFish Server Open Source Edition 3.1.
- Then choose the Zip-Archive glassfish-3.1.zip (GlassFish Server 3.1 Open Source Edition Full Platform)
- In your <dev_home> create a folder called glassfish.
- Unzip the Zip-Archive here
Configure Eclipse
- Open Eclipse.

- In the Eclipse menu bar select "Window > Show View > Servers".
- In the "Servers" view right click on the white space and select "New > Server".

- Select the Link "Download additional server adapters". Eclipse now downloads available server adapters.
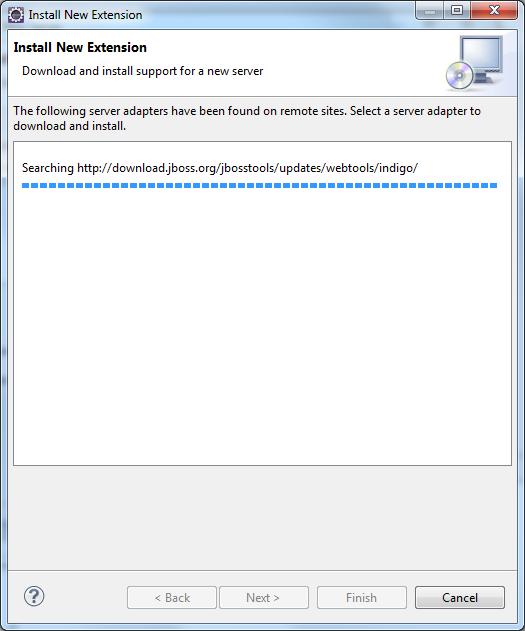

- Select "Oracle Glassfish Server Tools" from the list.

- Accept the license and select "Finish". The download begins.


- Restart Eclipse to activate the new adapter. When you re-enter Eclipse you see the Glassfish server tools front page.

- Close that view and go to the Workbench.
- In Eclipse go to the "Servers" view (remember: window available at the bottom) and right click in the white space, then select "New > Server".

- Select GlassFish Server Open Source Edition 3 (Java EE 6) and select "Next"

- Select your home directory for the GlassFish instance you downloaded, that should be <dev_home>/glassfish/glassfish.
- Select "Finish" if possible. Otherwise, you may have to specify a domain. In that case select "Next".The domain should be preselected, then click "Finish".


- You should see in the "Servers" view that Glassfish was added.
- To start the server right click on Glassfish server and select "Debug".
- Go to the "Console" view (another window available at the bottom in the Eclipse workbench) and see how GlassFish talks to you :-). You may need to change into the server.log to see the log entries displayed. I have higlighted the toolbar button where you can change to the server log. To maximize and minimize the "Console" view you need to double click the "Console" tab.

- To verify installation go to your web browser and enter http://localhost:8080.

- Select the Link "goto the Administration Console" to enter the Admin Console.

- You can manage GlassFish in the Admin Console. Take a look around.
Your environment is complete now. It's time to get the demo application going.
Starting and using the demo application
In one of the previous steps we have created a Java EE based application with Maven. We have to import it into Eclipse. You can do this as follows:


In one of the previous steps we have created a Java EE based application with Maven. We have to import it into Eclipse. You can do this as follows:
Import your Java EE application
- Open Eclipse.

- In the menu bar select "File > Import".

- Enter "Existing" into "Select an import source".

- Select "Existing Projects into Workspace" and click "Next".

- Select the root directory of the application you have just created with Maven. This should be <dev_home>\workspace\jee-app-weld. Then select "Finish".

- The project will be imported. You will notice when you go to the "Markers" view that there are several errors. We have to fix those. Right click the Project "jee-app-weld" and select "Properties" from the context menu.

- Goto "Targeted Runtimes".

- Select GlassFish and then press "OK". This should clear all compile errors in your "Markers" view

Bugfix the demo application
Unfortunately, when this post was written the demo application archetype was in beta state. So you have to do some stuff to make it functioning properly. It's a good exercise to get used to Eclipse.
- In Eclipse, press Ctrl+Shift+R. The "Open Resource" dialog shows up.
- In "Select an Item" enter "persistence.xml", select it in the list below and press "Open".

- Repeat the last two steps for the file "home.xhtml".
- You should have opened two files now: persistence.xml and home.xhtml
- Look at my fixed persistence.xml file and make yours look the same.

- I have changed the jta-data-source to the GlassFish setting (default was JBoss) and I have added the property eclipselink.ddl-generation.output-mode to the "Properties for EclipseLink" section. The property makes sure that the database is created on application start-up.
- Save your changes with Ctrl+S (or in the menu bar File > Save).
- The second file to adopt is home.xhtml. Here I have changed <h:dataTable var="_widget" value="#widgets"> to <h:dataTable var="_widget" value="#{widgets}">.

- Save your changes with Ctrl+S (or in the menu bar File > Save).
Note: see this blog entry about persistence.xml and this blog entry about home.xhtml for additional info for the solutions explained above.
Configure Eclipse for deployment
We are almost done. Now, you need to explain Eclipse that the GlassFish server is the deployment container. You do this as follows:
- In the "Servers" view right click on the Glassfish server and select "Add and Remove".

- Select your application and press "Add" to move it in the right section.

- Press "Finish".
- The last thing to do is to make sure Glassfish starts the integrated Derby database, so you can use the default JDBC datasource. In the menu bar go to "Window > Preferences".

- Select "GlassFish Preferences" and select the checkbox to enable the JavaDB when the server starts. Then press OK.

That's it already in terms of preparing Eclipse. Now start the demo application.
Starting and verifying the demo application
- Select the Glassfish server in the "Servers" view and richt click into the context menu, then select "Debug" (make sure the Server is not running already, if so stop the Server first).
- See the "Console" view to verify that the application started properly. Again: double click the "Console" tab to maximize and minimize the view in the workbench. Make sure you see the server.log.

- Go to your web browser and enter http://localhost:8080/jee-app-weld

You're done. You have created your own Java EE development environment. From here look around a litlle and build your own project.

Very nice and much needed tutorial that is often overlooked. I'll see if this can be added to CDISource. A good follow-up piece would be setting up SVN/Maven/Hudson (or Ant, CVS, etc) or adding unit testing (perhaps via Arquillian or any other Java EE unit testing solution).
ReplyDeleteHi Reza, glad to have you here again. I am currently working on the "integration testing with arquillian" trail ... Cheers, Niklas
ReplyDeleteIt's my pleasure. It's always good to see more written material on Java EE 6 -- we definitely need it.
ReplyDeleteLet me know if you need any help with it -- I'm pretty easy to reach :-). If needed, I can also get you in touch with the Arquillian team itself. They could definitely need more feedback from experienced users like yourself.
Hi Niklas,
ReplyDeleteGreat article.Would you be interested in joining DZone's MVB Program (see dzone.com/aboutmvb)? I think your articles would do really well. If you're interested, email me (james at dzone dot com) and we can discuss further
James
Do not select GlassFish Server Open Source Edition 3 (Java EE 6) as a server if you are using the GlassFish 3.1.x server.
ReplyDeleteSelect the GlassFish 3.1 server wich is the latest server, otherwise, you may have issues deploying complex applications
Hi Niklas,
ReplyDeletewhy do you use
toplink.ddl-generation.output-mode instead of
eclipselink.ddl-generation.output-mode?
Uwe
Hi Uwe,
ReplyDeletethx for noticing that. I had issues when I created the database. The toplink entry worked, so does eclipselink.ddl-generation.output-mode ... I changed it to eclipselink which is more meaningful obviously.
Thx again.
Cheers,
Niklas
I use Linux Operating systems for java development. Will you give me more details regarding setting up a java EE 6?
ReplyDeleteThanks for sahring with snapshots..
ReplyDeleteJava Developers
the blog is about Setting up a Java EE 6 development environment #java it is useful for students and java Developers for more updates on python follow the link
ReplyDeleteJava online training